A Vintage-look Andy!

Sunday, January 11, 2015


Ever since my kids were little toddlers, which is about 28 years ago, I've made Raggedy Ann and Andy's for them and for all the special little kids in my life.  


I've made them for nieces and nephews, my best girlfriends children, my grand-daughter and a few on commission.  

(I actually have a box that says "Raggedy Ann and Andy Hospital" and it, unfortunately, is full of numerous dolls in need of repair.  They have the owners names pinned to them:  Matt, Andrew, Emily, Carol Kay, David .... etc!  Dolls that are about 20 years old that I need to repair and send back to their original owners, now some of them parents themselves!)


The pattern I use was my mothers, McCalls 6941.  It is the pattern she made dolls for each of us four kids when we were little.  I think my mother has our dolls in her cedar chest.    

Although my pattern isn't in as good of condition as the picture I pulled off of internet!  Mine is tattered and torn and written on by my daughter, Andrea, when was five years old and wrote on  everything!  


It is a very sweet little pattern full of wonderful details.


I was commissioned to make this little Andy for the grandson of my dear friend.  

(Remember Grant?)


The hair is the trickiest detail.  I've never been very good at it.  But the key is to make it really full and thick.  When I was in New Mexico in November, my Mom worked on his hair for me and then I finished it up by adding a lot of thickness!  I was happy how this one came out, with his cute little Sailor cap.


I do love the handwork required in this pattern.  I did a little looking at all the newer Ann and Andy patterns.  First of all they are hard to find and I noticed that nothing is hand sewn.  Most of them are painted.  I just love the hand sewing.  I even love the button eyes.  I think a lot of people worry about children pulling the eyes off and swallowing them.  I guess that is the world we live in.  Incidentally, all of the Ann and Andy dolls in my "hospital" still have their eyes!  It is the hair and clothes that is missing!


He's just a darling little vintage look doll.


I loved wrapping him up all pretty for Christmas and  sending him to Grant.


And from the picture his Mommy texted me, I think Grant loved getting him!


I'm excited for this new year - I've got some fun projects planned and a few changes coming to my blog.

 And later this week, I've got a really exciting give-away planned here on my blog!   Be sure to come back in a few days - you won't want to miss your chance to win!  

(And it's not a Raggedy Ann or Andy, sorry!)


The Garage {Slash} Shop Is Finished!

Friday, January 2, 2015


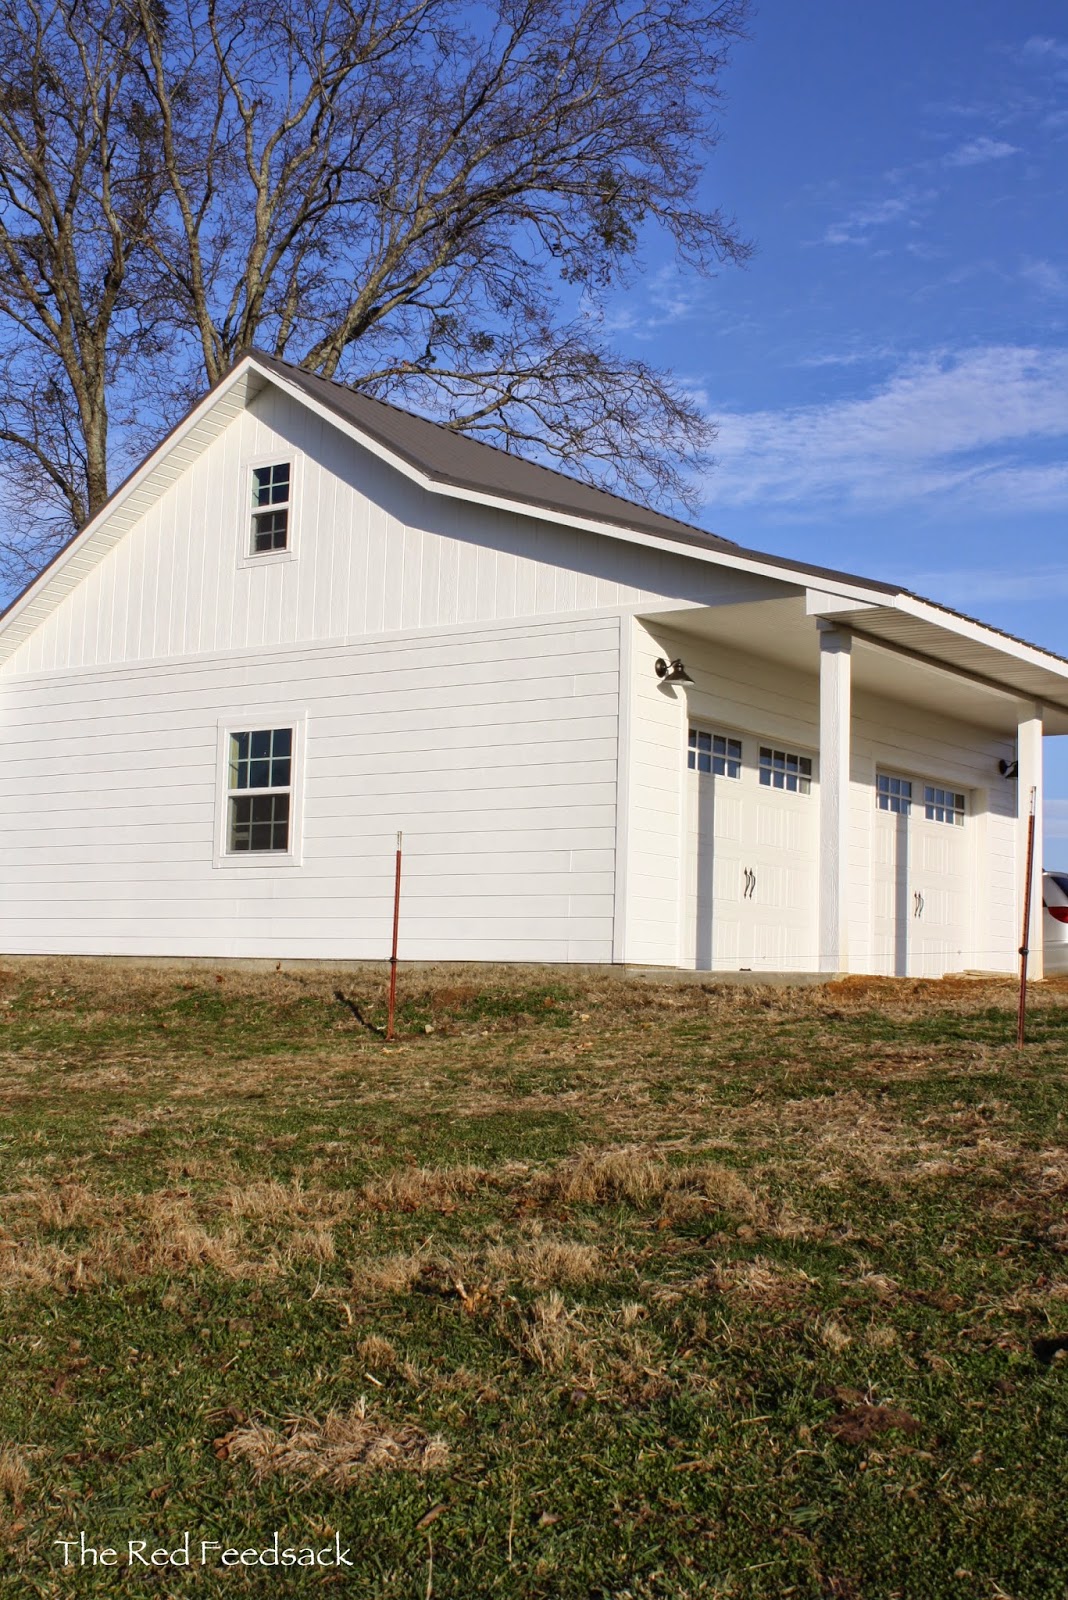
Our garage/shop is finished!  I hesitated to even write this post as we've had nothing but rain which results in a very muddy hilltop that is not at all pretty right now.  But it is a very exciting event to have Eldon's shop finished so I thought I would share it!  


This is the view as you come up our driveway muddy road to the back of our house and the garage.  The next big job awaiting us in the Spring is our landscaping, building a yard fence, putting in a cattle guard and building the rails, etc. on our back porch.  I can hardly wait!  Luckily I have a husband that loves to work right?


We really love the way the garage came out.  I wanted to go the easy route and have metal siding.  Eldon insisted on it matching the house and having the Hardy Plank siding.  Wow, am I happy he won that argument!  It looks really nice.


We painted it the same color as the house, put on the same color metal roof, built the porch the same and....


... even did the same beadboard ceiling on the porch that we did on the house porches!  


Here is the view from the other side of the hill.


I really love the inside.  It is definitely Eldon.  He put sheet rock on the ceiling and this awesome wood on the walls.  It gives it a nice wood smell and looks very masculine!  This is the side of the garage where we'll be parking our boat.  You didn't think we'd be parking CARS in here did you??!!  (Smile)


The art on the walls is compliments of our son who is an Aerial Lineman and works off of a helicopter platform.  He found these vintage pictures from the company that he works for and they gave them to him.  They are a fun addition to the walls.  


And the wood stove is the greatest thing ever!  That means he can work out here in the freezing cold weather conditions!  And I can bring my cup of coffee and sit by the fire and talk about the next project!


Custom work benches and table on the other side of the garage.  This is the shop part.  The place to work on projects.  The table can be moved out of the way if Eldon needs to bring a vehicle in to work on it.  (Yes, he does that too.)


At the  end of the work bench is an old roll top desk that is solid wood and weighs a million pounds.  We moved it from Utah, have had it in storage for 3 years and I refused to put it in the house.  Eldon said he'd make use of it in his garage!  It's funny because it actually looks pretty good!  


Then the other end with the carriage doors.  I helped Eldon install those things and it was an interesting job.  But we got them in and they work!


I love that we have attic space to store our camping gear and things.  The little pull down ladder is awesome.  Our grand-girls think it is amazing and I'm glad that when it's folded up into the ceiling they can't reach it!  (And the boat barely fit in its half of the garage!)  


It's the perfect attic space, with a light and windows on each side.  

I'm so glad that Eldon has his "space" back!  I know how much I hated not having my Craft Room.  It's kind of a fun place to hang out and I'm thinking I may have a few projects to do out here too.  (I imagine permission will be necessary first!!)  

Hope your New Year is off to a great start.  We started ours out with our kids all home and it was so special to have a house full of family, laughter, and craziness!  


I Love Simple, Fast Crafts!

Thursday, December 18, 2014


It's been a very fun couple of weeks doing some little crafting projects.  The kind that you can sit down and finish in about an hour!  


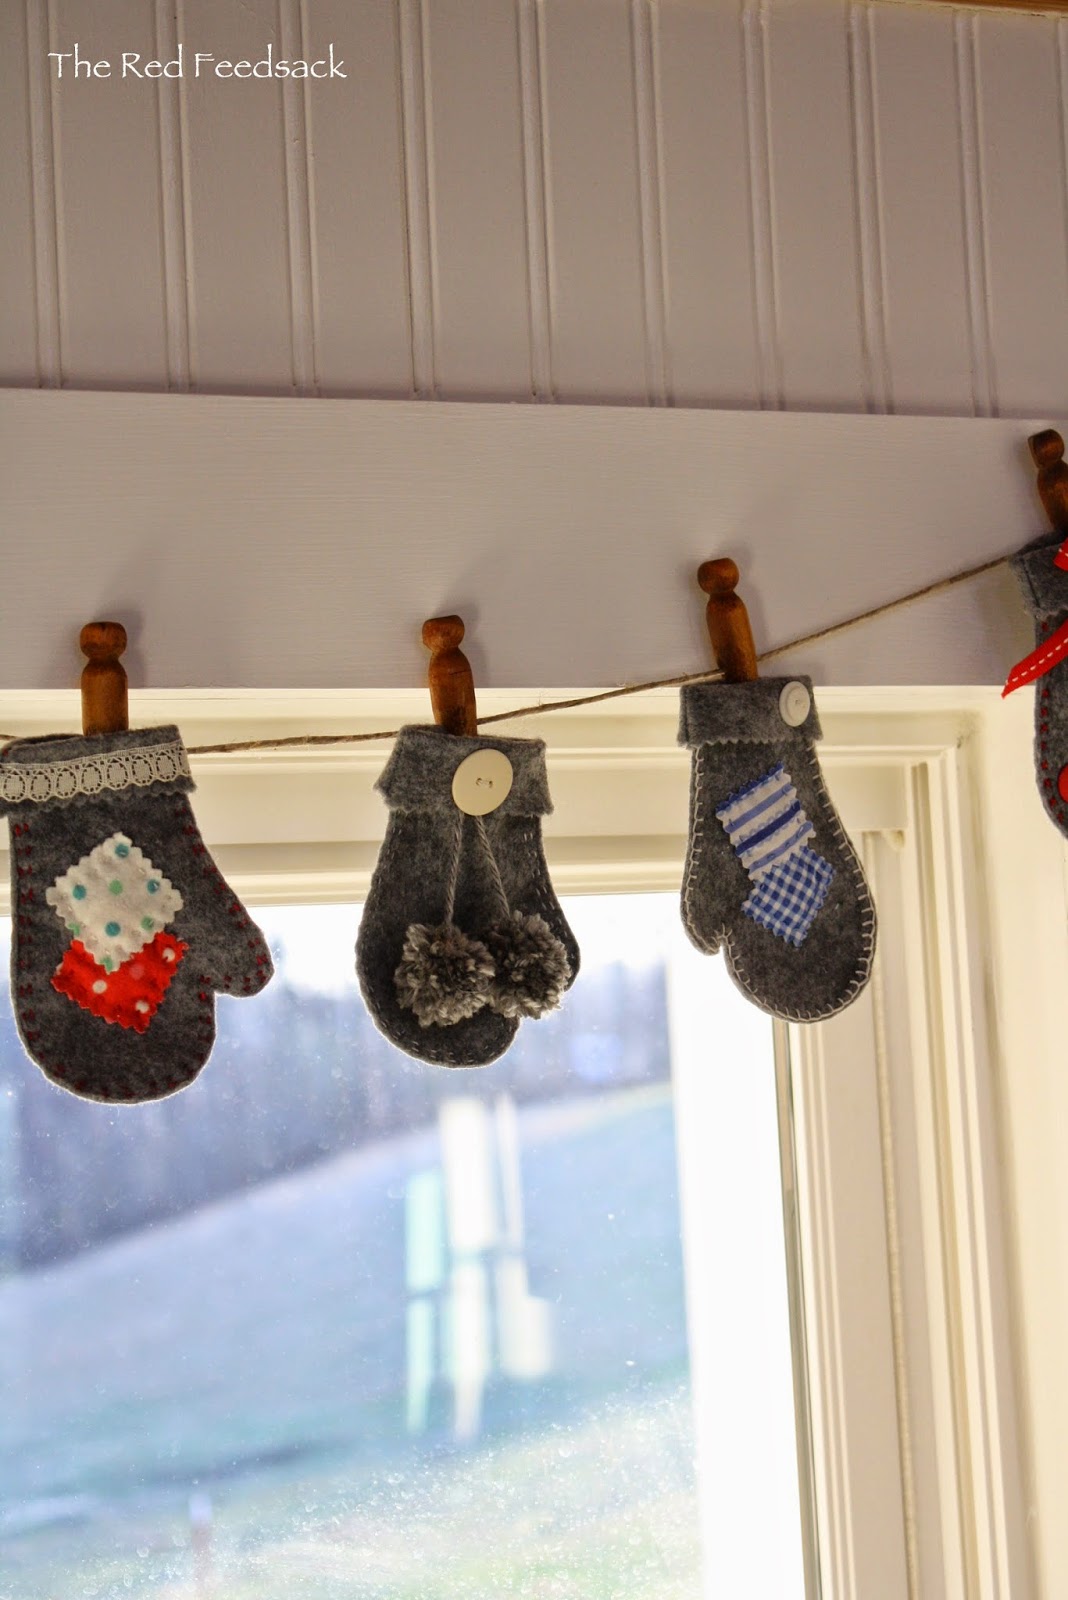
I love this little mitten garland that I made to hang in my kitchen window.  It adds a little bit of cheery charm to the gloomy days of winter.


I also knew it would be a really fun project for a craft night with my little grand-girls.   So I gathered all kinds of ribbon, lace, buttons, fabric scraps, yarn and felt and planned a craft night!


I've been trying to do some crafts that even Rosy, the three year old, can do without getting too frustrated.  She did amazing with this!


I sewed the little mitten together and let her sew on the little red patch and the button.  She did so well and it just came out darling.


Jillian, who is six, is getting very good with a needle and thread!  She had no problem sewing the outline stitch and the patch on her mitten.  She also sewed on her buttons.   She is at the age where she really sticks with a project until it is finished.  I was really proud of her!


Her stitches are getting more and more consistent!


So if you are looking for a fun winter project to do with your little children or grand-children here is the little how to for you!  I got my inspiration and mitten pattern from here.  You could also do stockings, but I love the little mittens.  


Cut out your mittens from felt.  I really liked how the grey felt came out.  Cut around the edges with regular scissors and across the top of the mitten with pinking shears.


Sew around the edge with your sewing machine, leaving the top of the mitten open.  I didn't worry about sewing that close to the edge or that perfectly as you will trim this anyway.  Then, with colored embroidery thread sew a decorative stitch around the mitten, right to the edge of your seam.  (Be sure to start about an inch down the side so that when you fold your mitten "cuff" over the stitching won't interfere with that.)


Once you've sewn your decorative embroidery stitch, use very tiny sharp scissors to trim off the extra felt.  Cut carefully right up to the edge of the seam.  


Then you end up with a nice finished edge.  


Have fun and try different stitches.  Anything goes and they sure don't have to be perfect.  


Add any kind of embellishment that you want.  This little snowman ornament and a tiny pom pom came out very cute.  (Jillian made the pom pom - she worked until she got all those little pieces of yarn trimmed to perfection!)


Buttons and fabric patches are really cute.


Use vintage clothes pens and pen the mittens to a string of yarn in the window.  It is a very fun little project that costs very little and takes hardly any time!

Happy Holidays to you!  We are looking forward to good food, good times and good friends next week.  (Remember Baby Grant?  He and his sweet Mommy and Daddy are coming to visit!!)

Have a wonderful Holiday week!


An Antique Trunk Just For Me!

Friday, December 12, 2014


Back in October I was visiting with a friend in Alabama and she said, "Dori, I've got an old trunk that I don't have a spot for anymore, would you like to have it?"  


I was almost salivating when I said, "Yes, please"!  


A few weeks later her parents delivered it to me and I was shocked.  I had absolutely NO idea it would be so huge.  


I also had no idea it would be in such excellent condition and so beautiful.


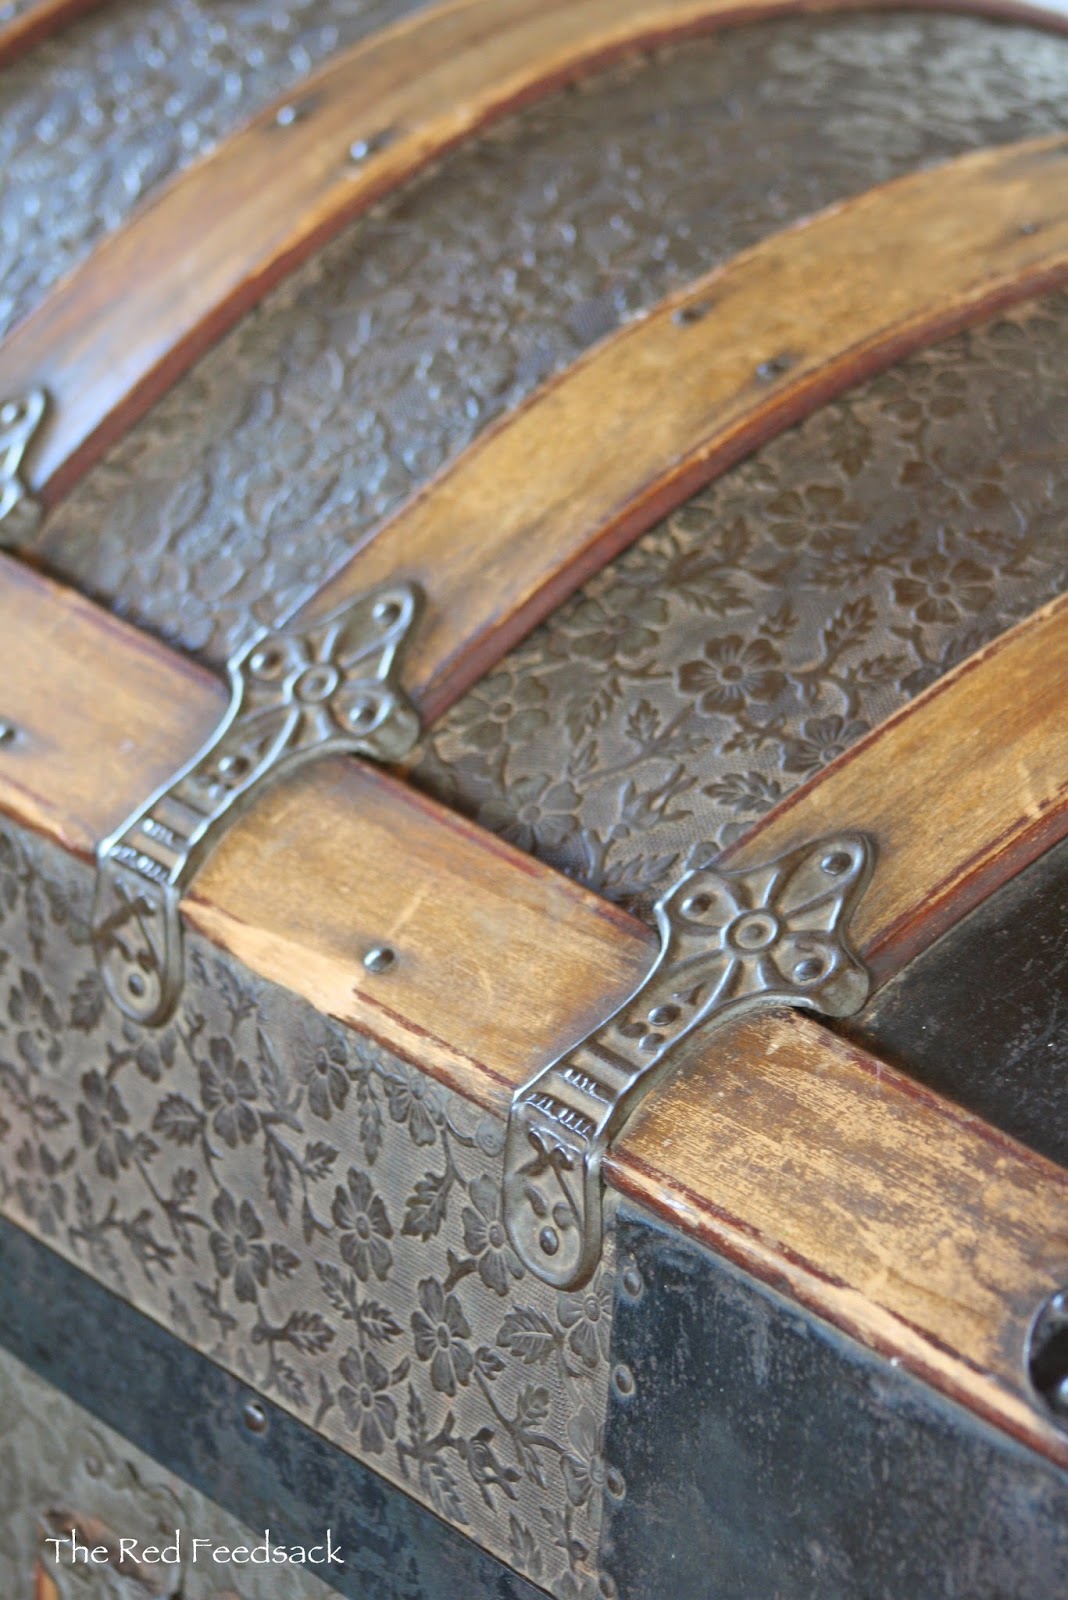
The details are just amazing.


I love the wooden slats on it and the hardware that connects them.


And the embossed flower pattern on it is so beautiful.


I've discovered a few things in my research.  There are tiny little numbers on the lock that are very hard to read but they are the Patent number and the year of manufacture.  Mine says 1883!!!  Isn't that crazy?   


On the ends of the truck there were leather handles at one time.  I found out in my reading and research that you can hardly find a trunk that the leather handles are still intact. I guess that makes sense in a trunk that is 131 years old!  However, the leather can be replaced and I hope to do that some day.  


I also read that the trunks with rollers are more valuable than the ones without.  I didn't think mine had rollers until I turned it upside down and there they were... tiny little rollers!  


The inside tray is missing, but that sure doesn't bother me any.  It is in very nice clean condition and guess what I intend to put in there?  Yep, you guessed it.  My old quilts!  

I have been reading about Miss Mustard Seed's Hemp Oil and I have decided to purchase some.  I think it will really bring the trunk to life.    I'll be sure to do some "after" pictures so we can compare and see what it does to the old wood and metal.

Have any of you used it and if so, what do you think about it?  

I kept the trunk in my living room for about a week and just didn't ever feel like it quite worked.  I moved it to a place of prominence in the guest bedroom and it is perfect!!!  It really makes the room come alive!  

P.S.  Thank you Anita!