
When I wrote about the tea party I had for the little girls at my house I told you about the purses I made the for them. I promised a tutorial and here it is! The easiest little purse you'll ever make!
Here are the supplies you will need:
1/4 yard of fabric for outer bag
1/4 yard of contrast fabric for lining and strap
1/4 yard of batting or fusible fleece
Velcro (both hook and loop)
Buttons for "bling" (optional)
(You can conserve fabric by not doing a contrast, a 1/4 yard of fabric will be enough for one purse, with no contrast.)

Using the link at the bottom of my post, print out the page of pattern pieces and cut all your pieces from the fabric outer, lining and batting.

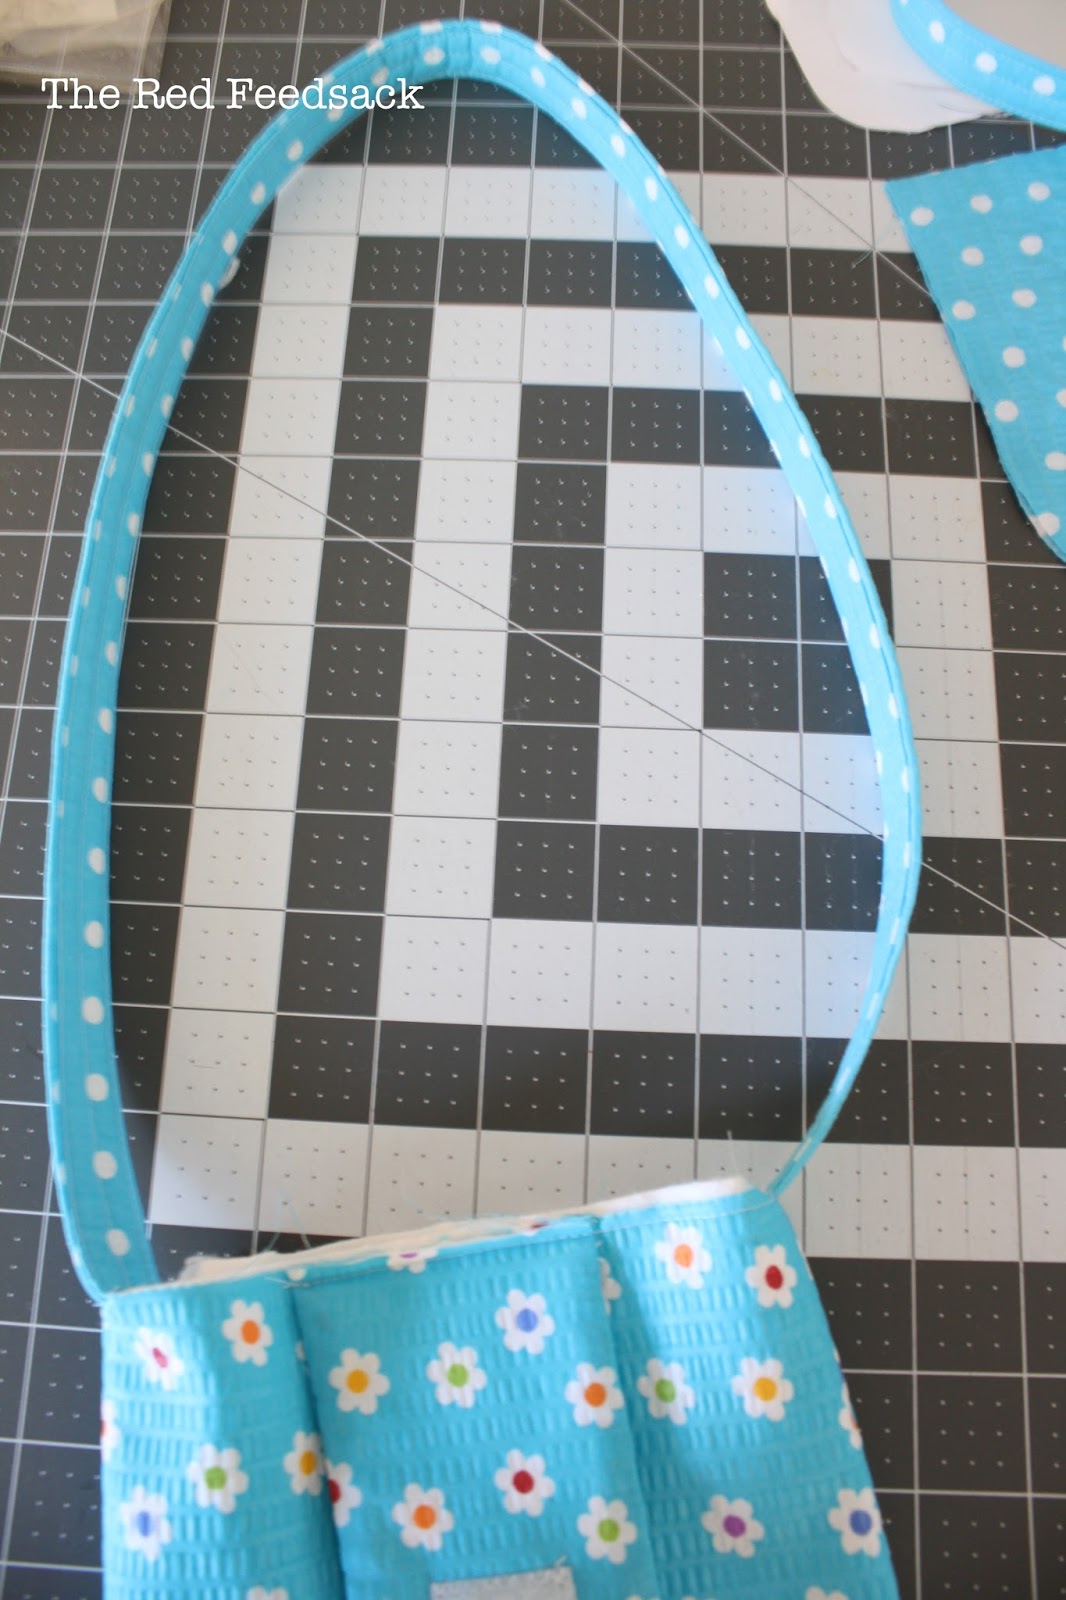
Cut a strap 3 inches wide by 30 inches long and a piece of fusible fleece (or batting) 1.5 inches wide by 30 inches long. If you use the fusible fleece, iron it to the middle of of the strap.

Fold both edges of the strap towards the center and press well, using a clip or pin to hold in place.

Now, fold it in half and press again. I then use the clips (or pins) to hold the fold in place for sewing.

I like to sew 1/8 of an inch from each edge and then straight down the middle. It gives a nice uniform look to the strap. But you would technically only need to sew the long open edge closed. Set aside your strap.

Take your two outer fabric pieces and your batting and layer them together like this: batting, fabric piece right side up, fabric piece right side down, batting.

Pin or clip in place.

Sew 1/4 inch all the way around, leaving the top edge open.

Turn right side out, making sure to push out rounded corners. Press well and set aside.

Repeat the exact same thing on your purse flap.

Cut a small piece - about 1 inch long - of velcro from both the hook and loop.

Take one of the velcro pieces (doesn't matter which one) and center it about one inch from the bottom of the purse flap. Zig Zag in place.

Pin or clip the purse flap to the center of the purse front, the side with the velcro piece facing up. Sew in place.

Now take your completed strap and pin or clip each end to the side edge of the purse. Sew those in place also. (Make sure your strap isn't twisted at the bottom!)
Your purse will now look like the above picture.

Take your purse lining pieces and place them right sides together. On the bottom edge you will leave about 2-3 inches open for turning. I place pens so that I am reminded to leave that open. Sew, leaving the top edge open and the bottom 2 - 3 inches.

Keep your purse lining wrong sides out. Take your outer purse body and place it inside the purse lining as shown in the picture above. Right sides will be together.

Pull your purse strap through the bottom opening of the lining, as shown above.

Pin or clip the edges together and sew in place using a 1/4 inch seam.

Pull outer purse through the opening in the lining.

After everything is completely pushed through, close the opening in the lining with a 1/8 seam.

Push the lining into the purse. Iron in place if necessary. Top stitch 3/8 inch from the edge of the purse all the way around the top. This will hold the lining in place and give it a more finished look.

Determine how far down from the top edge of the purse you want your remaining velcro piece to go. Center it and sew with a zig zag stitch, being careful to only sew on the front purse and lining and not the back of the purse also.

Your purse should now look like this!

Your purse is technically finished but I added a little bling to the ones I made. You can purchase fun buttons and sew them onto fabric yo-yo's that you attach to the side of the purse and also to the flap, covering the velcro stitching.
(A great video tutorial for making fabric yo-yos can be found here.)

Just that little bit of added embellishment gave the purses a final finished look and made them a little more fun for the girls!
I hope you'll make some right away for those favorite little girls in your life!
Link to my pattern pieces here. Please email me if you have any questions on making the purses!
Enjoy!

Hi my dear, that is truly a labor of love. I will save this post when my grandaughter arrives and is a little older so I can make it for her. Love it.
ReplyDeleteHope you are well.
Lisa
Absolutely brilliant! You make it look so easy. Thank you for sharing your talents with us.
ReplyDeleteSuch detail! Thank you! They will make gifts!
ReplyDeleteThank you so much for sharing your detailed instructions and pattern too (and for free!)
ReplyDeleteI can't wait to make them!
Cutie patootie! I like!
ReplyDeleteOh perfect! I am always scouting for cute ideas for the great-grandgirlies. I think I've found it. Thanks so much!
ReplyDeleteMade one for granddaughter using these instructions. Very fast and fun to make. Turned out so cute! Thanks.
ReplyDeleteI know now what my next project will be for my great nieces - thank you so much!!
ReplyDelete